Costlocker guide
  • GETTING STARTED
    • What is Costlocker and who is it for
    • Registration and Company setup
    • Quick start in 5 steps
      • 1. Add People
      • 2. Create Activities
      • 3. Create Clients
      • 4. Create Projects
      • 5. Time Tracking
    • What's next?
  • Projects
    • Managing a Project
      • Creating a Project
      • Creating a Project by Duplication
      • Auto ID
      • Tags
      • Responsible People
      • Discount on the project
      • Project Billing
      • Finishing a Project
      • Exporting the Budget
      • Locking a Project
    • Recurring project
      • Creating a Recurring Project
      • Working with a Recurring Project
      • Manually Duplicating a Recurring Project
    • Types of Budgets
    • Project Detail
      • Overview
      • Report
      • Alerts
      • Cost Estimate
      • Billing
      • Rates
      • Business Reports
      • Timesheet
      • Notes
    • Project Expenses
      • Project Expenses Report
    • Billable vs. Non-Billable Hours
  • People
    • Adding people
    • User Roles
    • Activating / Deactivating a Person
    • Salary
    • Bonuses
    • Calculating an Employee's Hourly Rate
  • Activities
    • Creating Activities
    • Activating / Deactivating an Activity
  • CLIENTS
    • Creating a Client
    • Activating / Deactivating a Client
    • Setting Default Client Rates
  • Time Tracking
    • Time Tracking
  • Timesheet
    • Daily Time Entry
    • Weekly Time Entry
    • Timesheet Views
      • Summary
      • Day by Day
      • Weekly
      • Live
  • Reports
    • Company Performance
    • Report of Finished Project
    • Workload
    • Business Reports
    • Project Expenses
    • Billing
  • Profitability
  • Your Company
    • Basic Overviews
    • Alerts
    • Overhead Costs
    • Fixed and Monthly Rate
    • Calculation of Overhead Cost per Worked Hour
    • Analysis Cost Allocation in projects
  • Settings
    • My Account
    • Desktop Application
    • Company
    • Groups
    • API
  • Applications
    • MacOS Application
    • Windows application
    • iOS Mobile Application
  • Integrations
    • Integration with Make
    • API
  • Subscription
    • Trial period
    • Switching to a Paid Account
    • Subscription Settings
    • Billing email adress
Powered by GitBook
On this page
  1. Subscription

Switching to a Paid Account

PreviousTrial periodNextSubscription Settings

Last updated 4 months ago

In the following article, we will describe the process of switching to a paid account.

When switching to a paid account, Costlocker will preserve all the data you entered during the trial period.

If you want to start with a clean account, create a new company in your account first.

After logging into your Costlocker account, click on your name in the top right corner, and from the displayed menu, select the Subscription** item.

Here, you will see the subscription selection page:
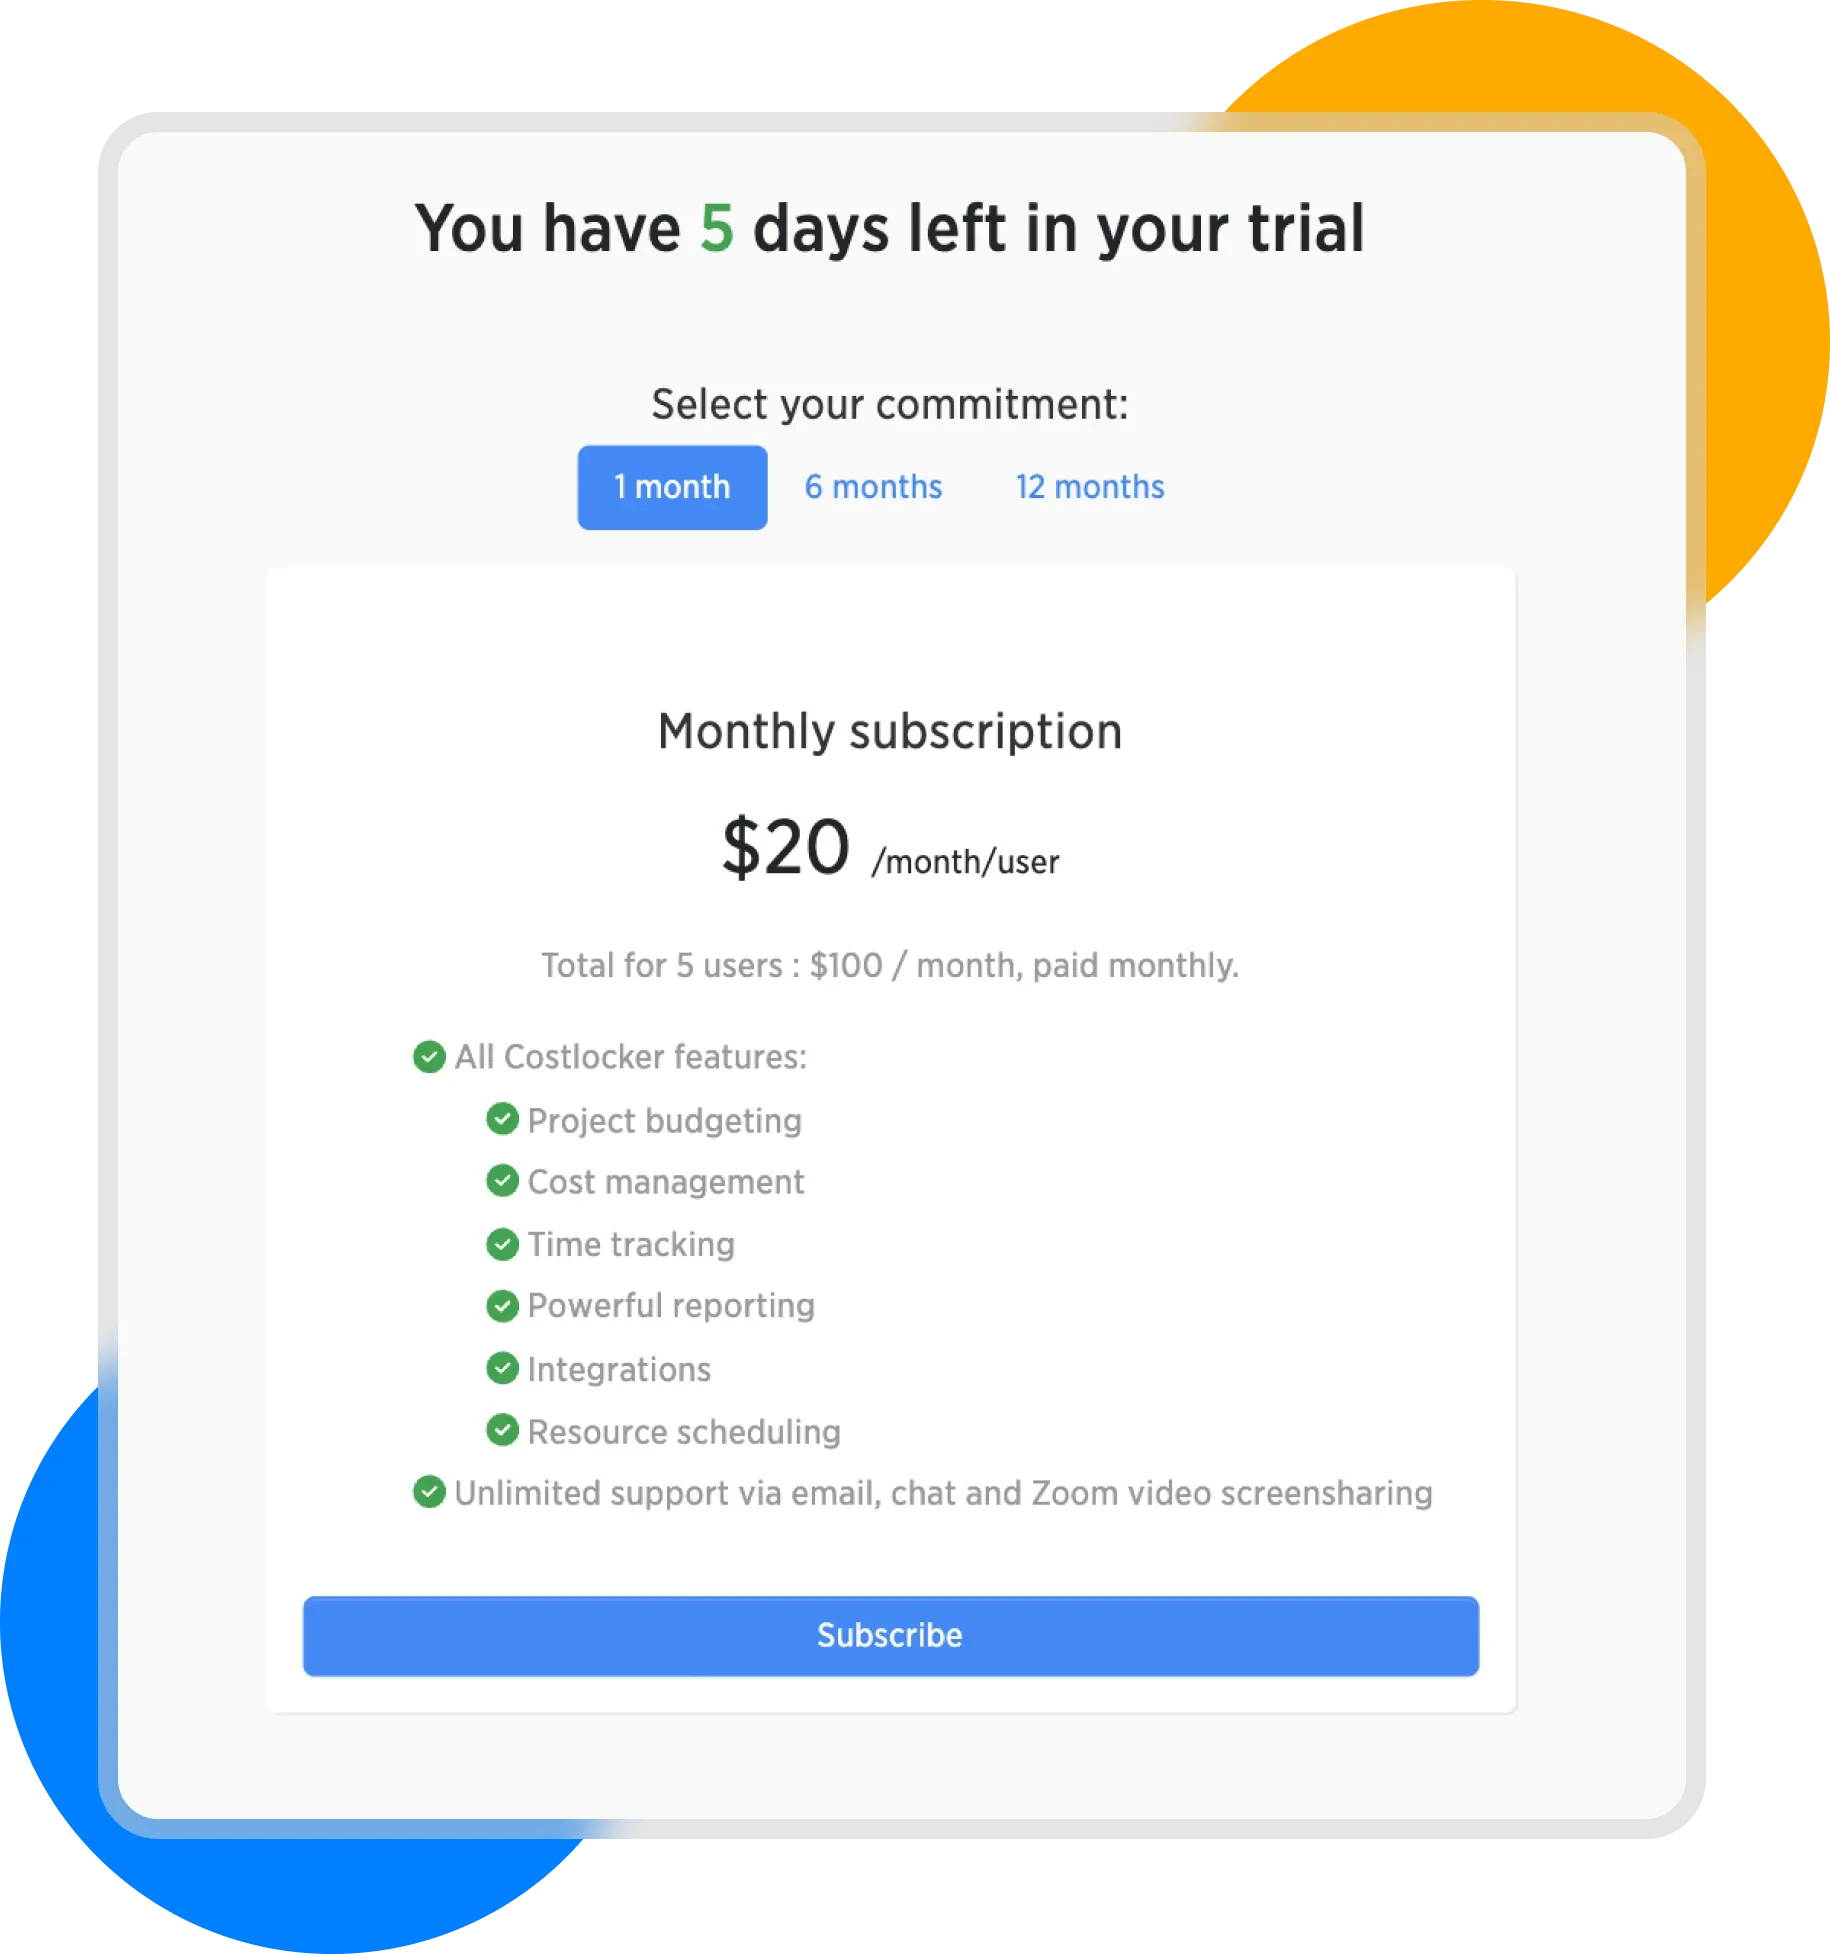
On this page, choose whether you want to pay for Costlocker monthly, every 6 months, or annually.

The longer the period, the cheaper Costlocker subscription is:

Payment
Monthly Price per User
Discount

Monthly

$20

0%

6-Monthly

$16

20%

Annual

$12

40%

Costlocker uses a credit system—if you remove users from an annual subscription in the future, Costlocker will deduct the unused period from the next invoice. See the article Credit System.

After selecting the billing period, click the Continue button.

In the next step, fill in the billing information.

In this step, you can also verify the amount for the overpayment.

Don't forget to enter your VAT ID if you have one!
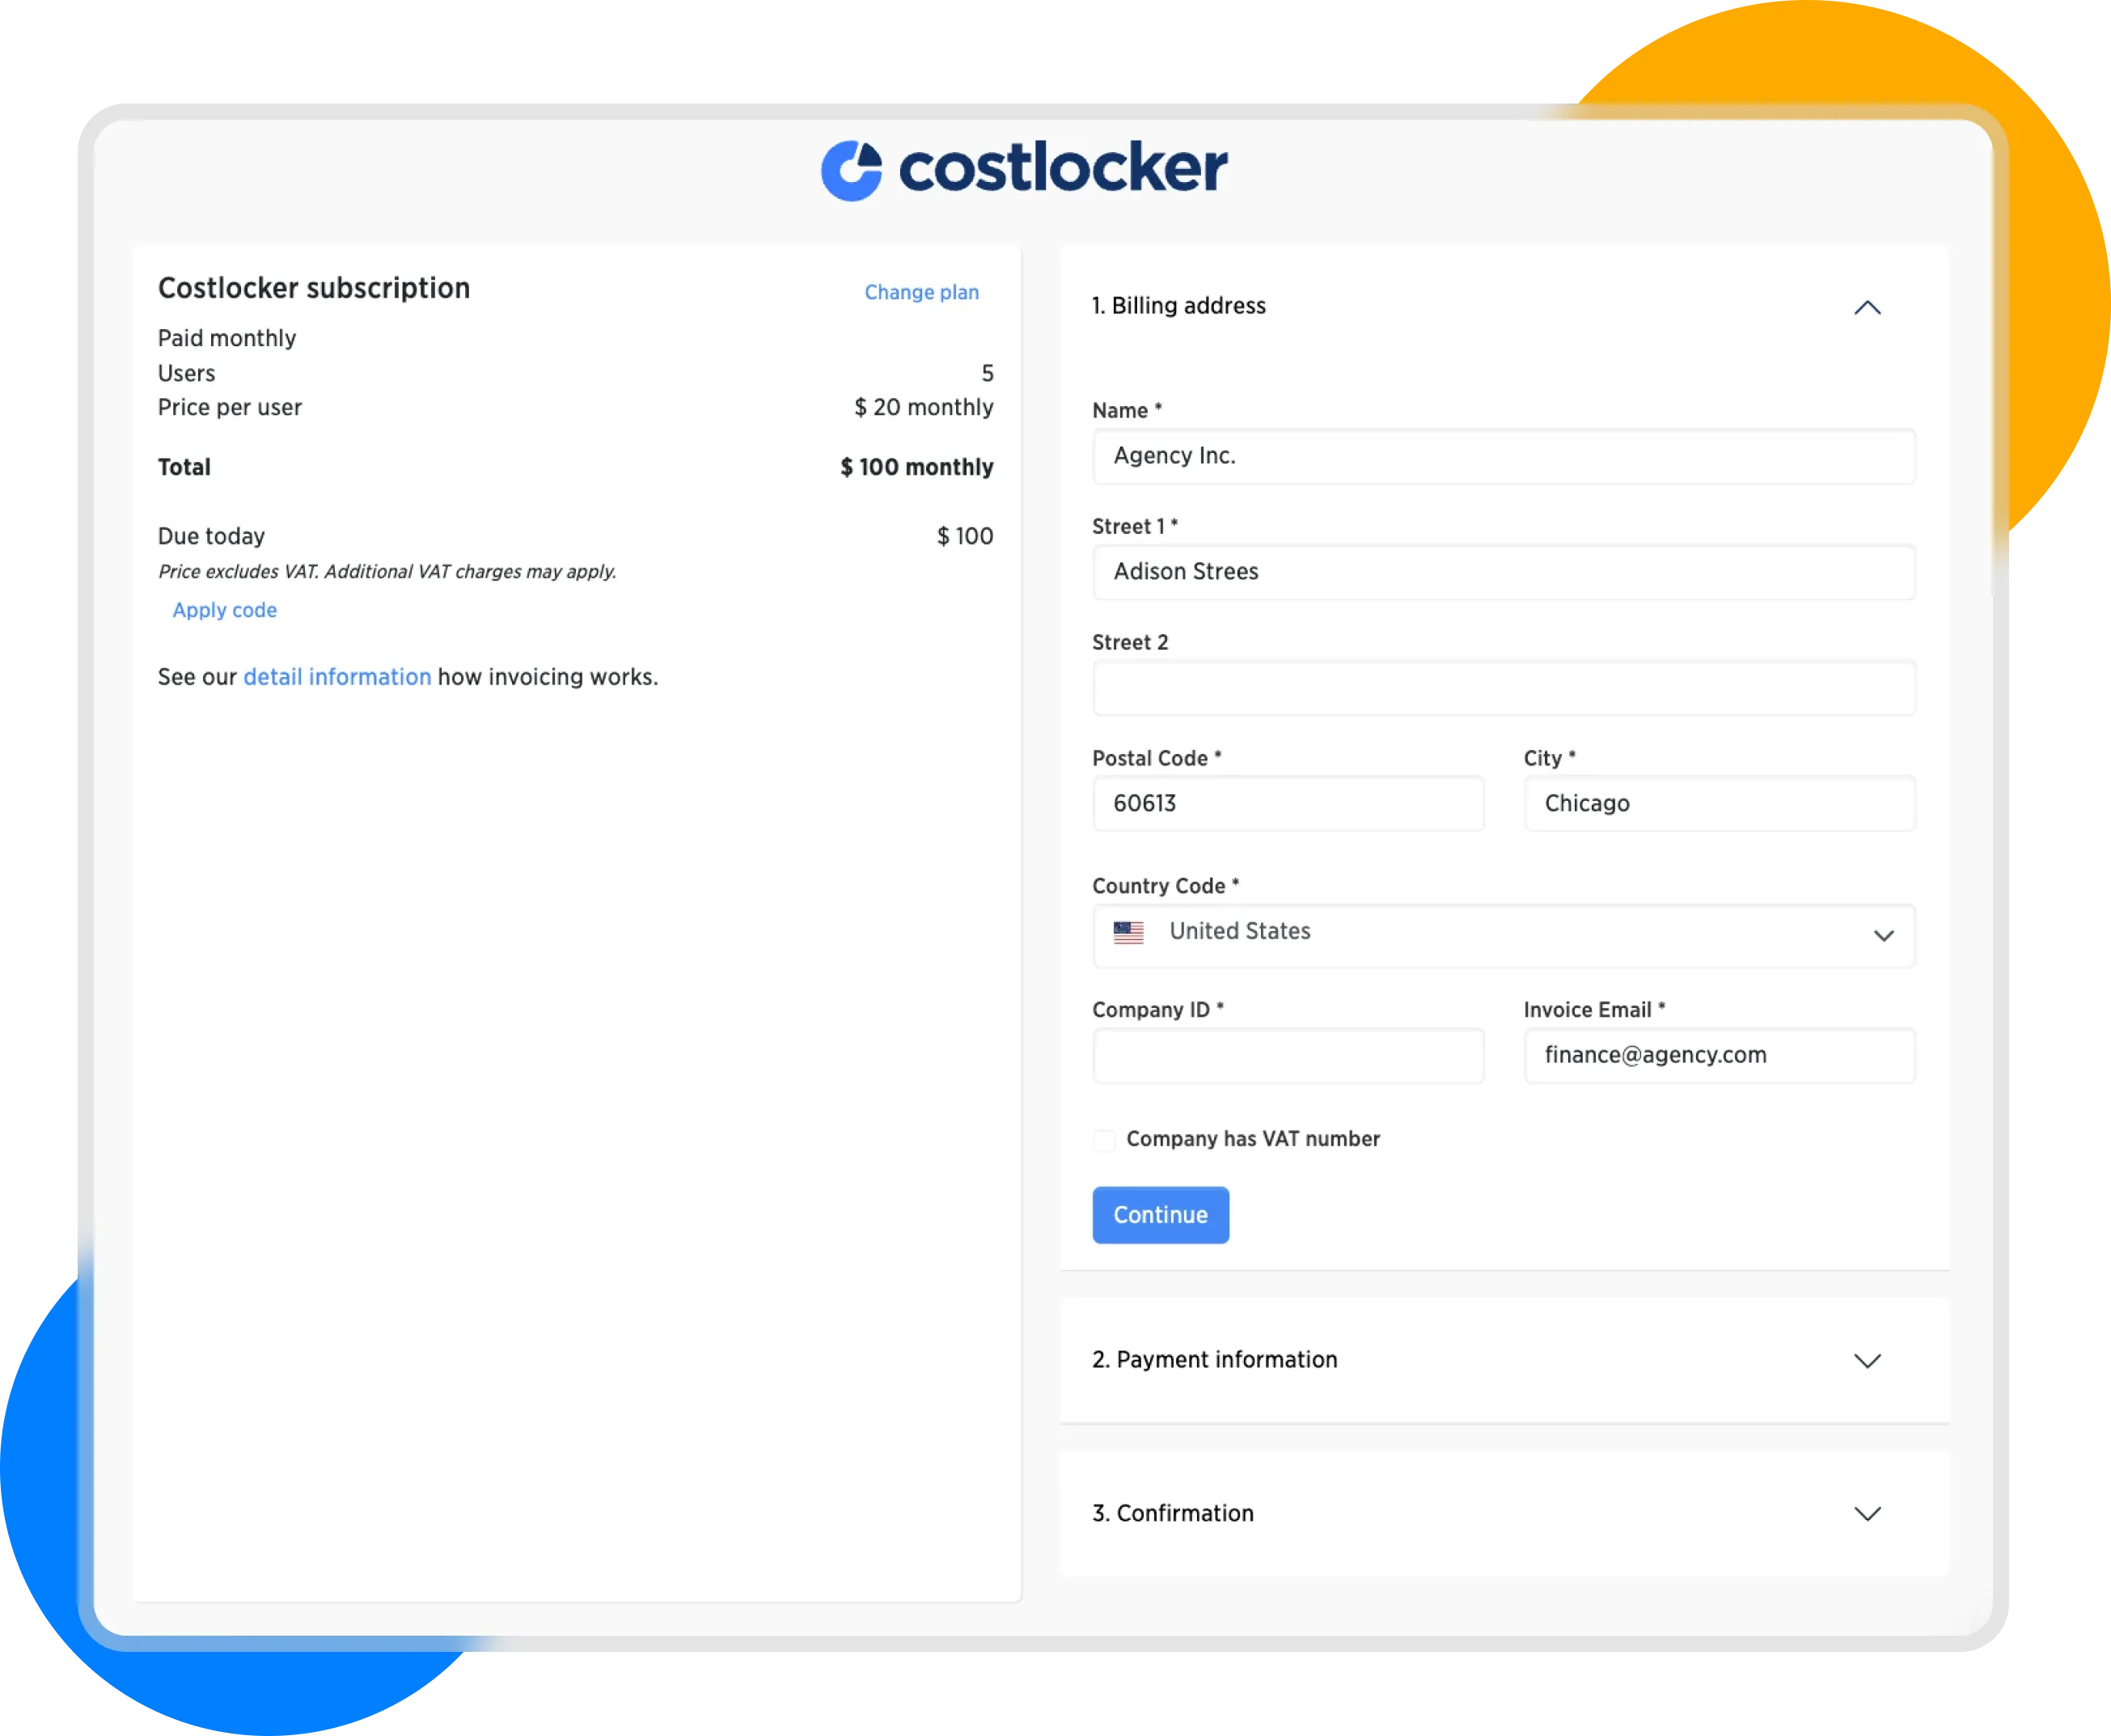
In the following step, enter your payment card details and confirm all data.

Costlocker does not have access to your payment card information.

You can find more information in the Security section.

Subscription select
Billing details