Creating a Project
Creating a Project
In the top menu, select the Projects tab and then click on Add New Project on the right.
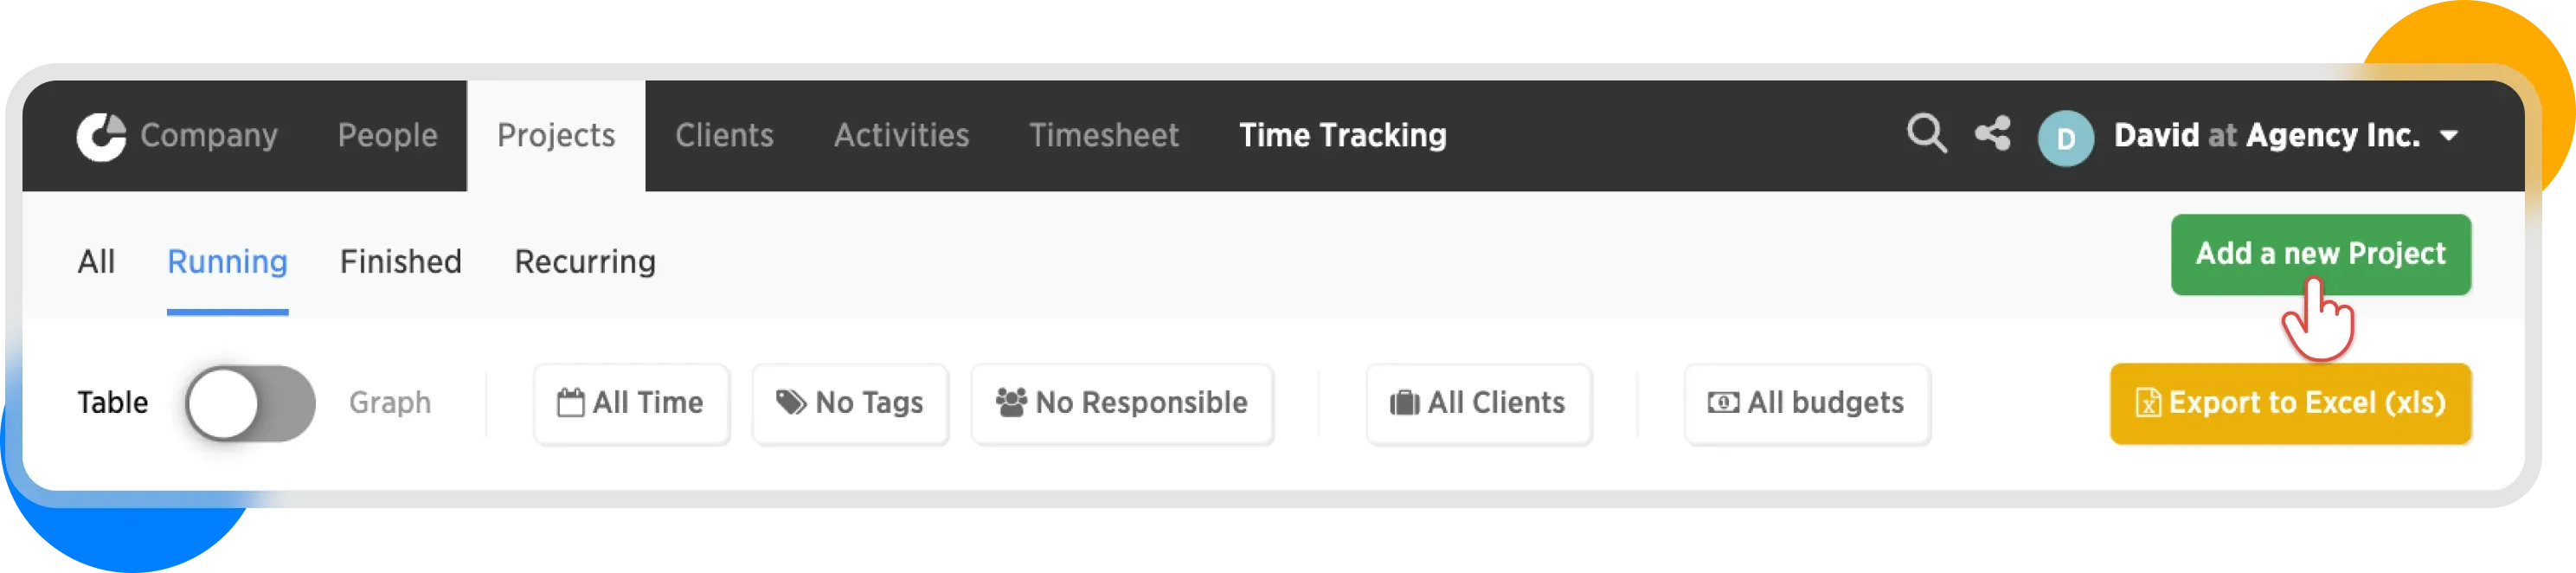
Add a new project
Project Form
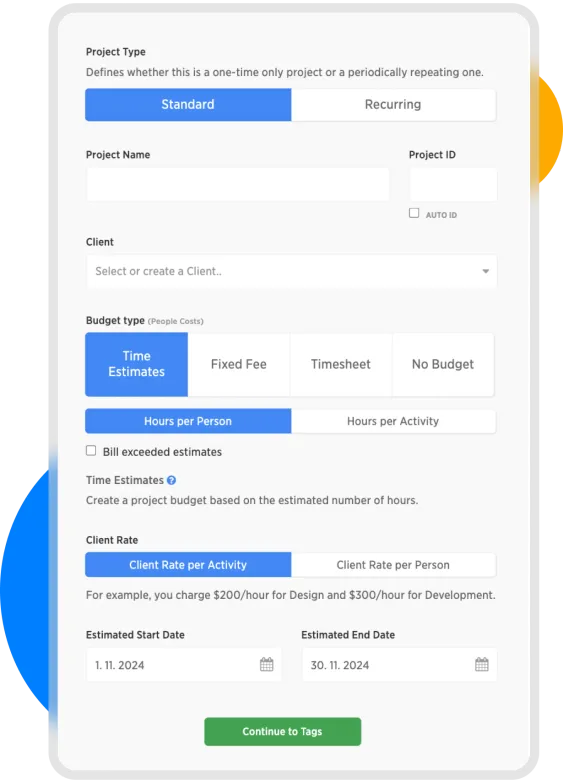
Create project form
Description of Individual Fields
Project Type
This option determines whether it's a one-time project or a recurring one. For more detailed information about recurring projects, see the section Recurring Project.
Project Name
Used to name and identify the project.
Project ID
Serves to identify the project uniquely. You can use your numbering sequence or let it be generated automatically by checking the AUTO ID box.
For more detailed information, see the section Auto ID.
Client
Select the client for whom you are executing the project. If you're working on an internal project, choose your own company as the internal client.
For more details, see the section Clients.
Budget Type
Costlocker offers many ways to define a project budget.
The budget type not only determines the final price of the project but also how revenue is allocated to individual employees and activities, affecting almost all reports. We recommend studying them thoroughly in the section Budget Types.
Project Start and End Dates
Used to record when the project starts and is expected to end.
💡 Each date has an important function:
Project Start
Before this date, team members cannot track time on this project on the Time Tracking page.
Project End
On this date, any remaining amount to be invoiced is scheduled in the invoicing forecast. Learn more in the section Project Billiing.
For our example, we'll fill out the form as follows:
| Field | Value |
|---|---|
| Project Type | One-time |
| Project Name | Website redesign |
| Project ID | 001 |
| Client | Milkshake Corporation |
| Budget Type | Time Estimates |
| Estimate per Person | |
| Client Rate | Client Rate per Activity |
| Project Start | 11/1/2024 |
| Project End | 11/30/2024 |
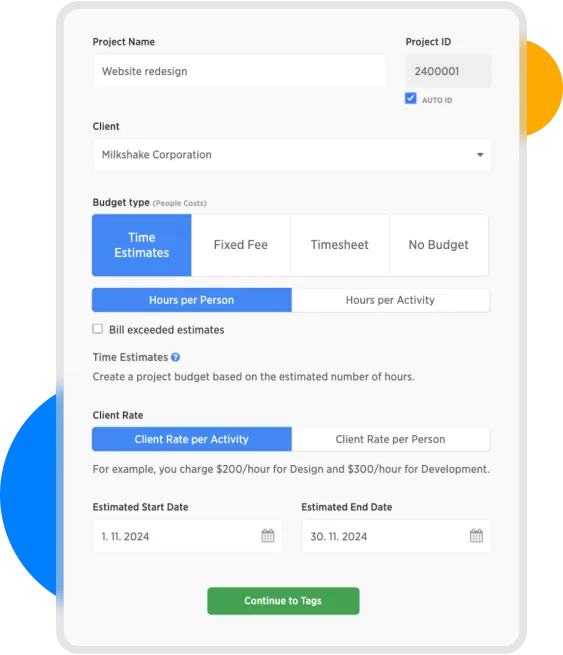
Filled Project form
In our example, we're using the budget type Time Estimates, which we'll briefly explain:
Time Estimates
Means that we'll bill the client based on our time estimates and predetermined hourly rates. Regardless of how many hours we actually spend, the budget remains the same.
Estimate per Person
Indicates that we'll assign each person a specific number of hours they are expected to spend on a given activity.
Client Rate per Activity
Means that the same hourly rate is set for performing a specific activity, regardless of who performs it.
Next, click on Continue to Tags.
The next part of the setup deals with project tags. We'll skip them for now. We'll cover Tagging in a separate chapter.
So let's proceed by clicking Continue to Budget.
Budget Form
Budget form
What remains consistent is filling in the activities and people on the left side of the form. Learn more in the section on Types of Budgets.
Now we'll fill in the individual activities of our project.
In our example, we'll use the following activities, which we created in the Create Activities section of Quick start in 5 steps guide.
In the table below, you can see the activities, team members, estimated hours, and the hourly rates we'll charge the client.
For the <me> entry, select yourself (in our example, David Maralík) so you'll be able to log your time on the project.
| Activity | Person | Estimated Hours | Client Rate |
|---|---|---|---|
| Design | Jessica Miller | 10 | $150 |
| Design | <me> | 3 | $150 |
| Development | Arthur Smith | 5 | $180 |
| Development | John Jackson | 15 | $180 |
| Account Management | Margaret Collins | 5 | $0 |
| Account Management | <me> | 3 | $0 |
In our example, we've set a zero rate for Account Management. This way, you'll see how Costlocker marks hours that won't be billed to the client.
After filling in the details, your screen will look like this:
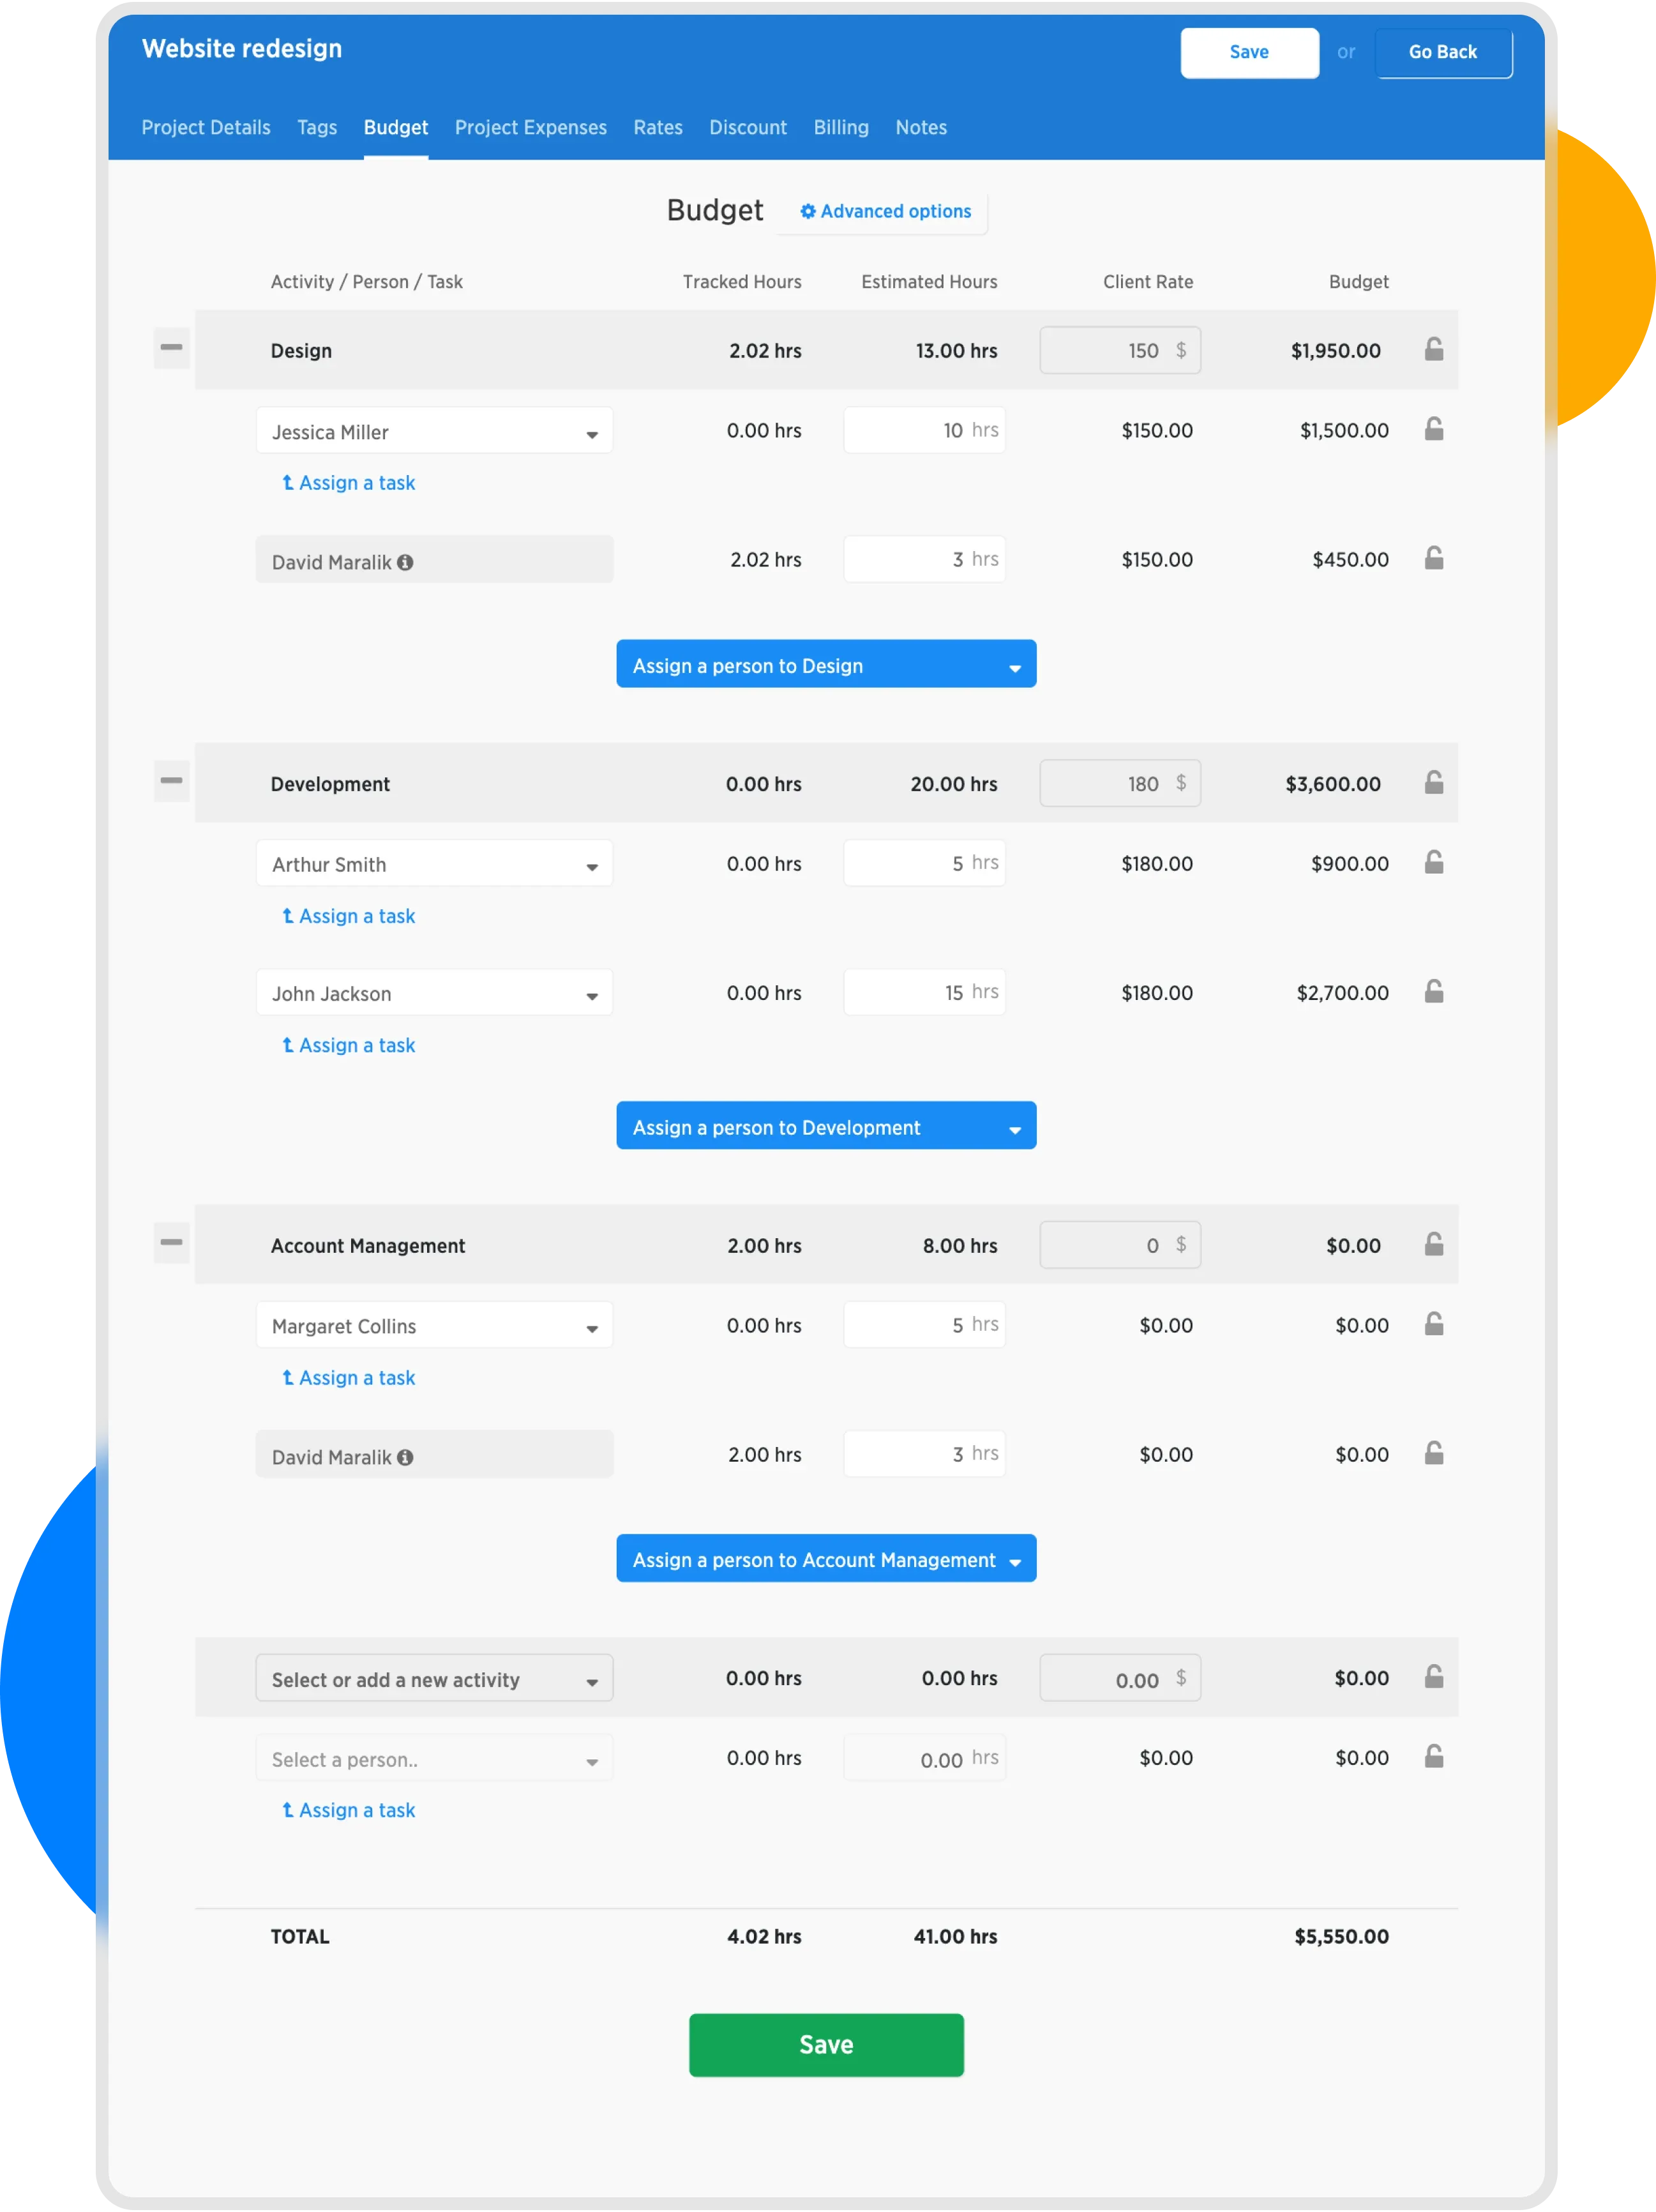
Completed budget form
From the completed budget, we see that a total of 41 hours are to be worked on the project, and we will receive $ 5,550.00 from the client for the work done by the team.
Click the Continue to Project Expenses button to proceed to the next step.
Project Expenses
Project expenses are used to record external purchases associated with the project. These are usually subcontracted freelancers providing services at a predetermined price or various resold items.
Some examples:
- Renting a photo studio
- Purchasing stock photos
- Outsourcing parts of the project to a subcontractor
- Travel expenses related to the project

Project expense form
In our case, we'll record the following items:
| Name | Purchase Price | Selling Price |
|---|---|---|
| Copywriting | $800 | $1200 |
| Traveling costs | $200 | $0 |
After filling in, our form will look like this:
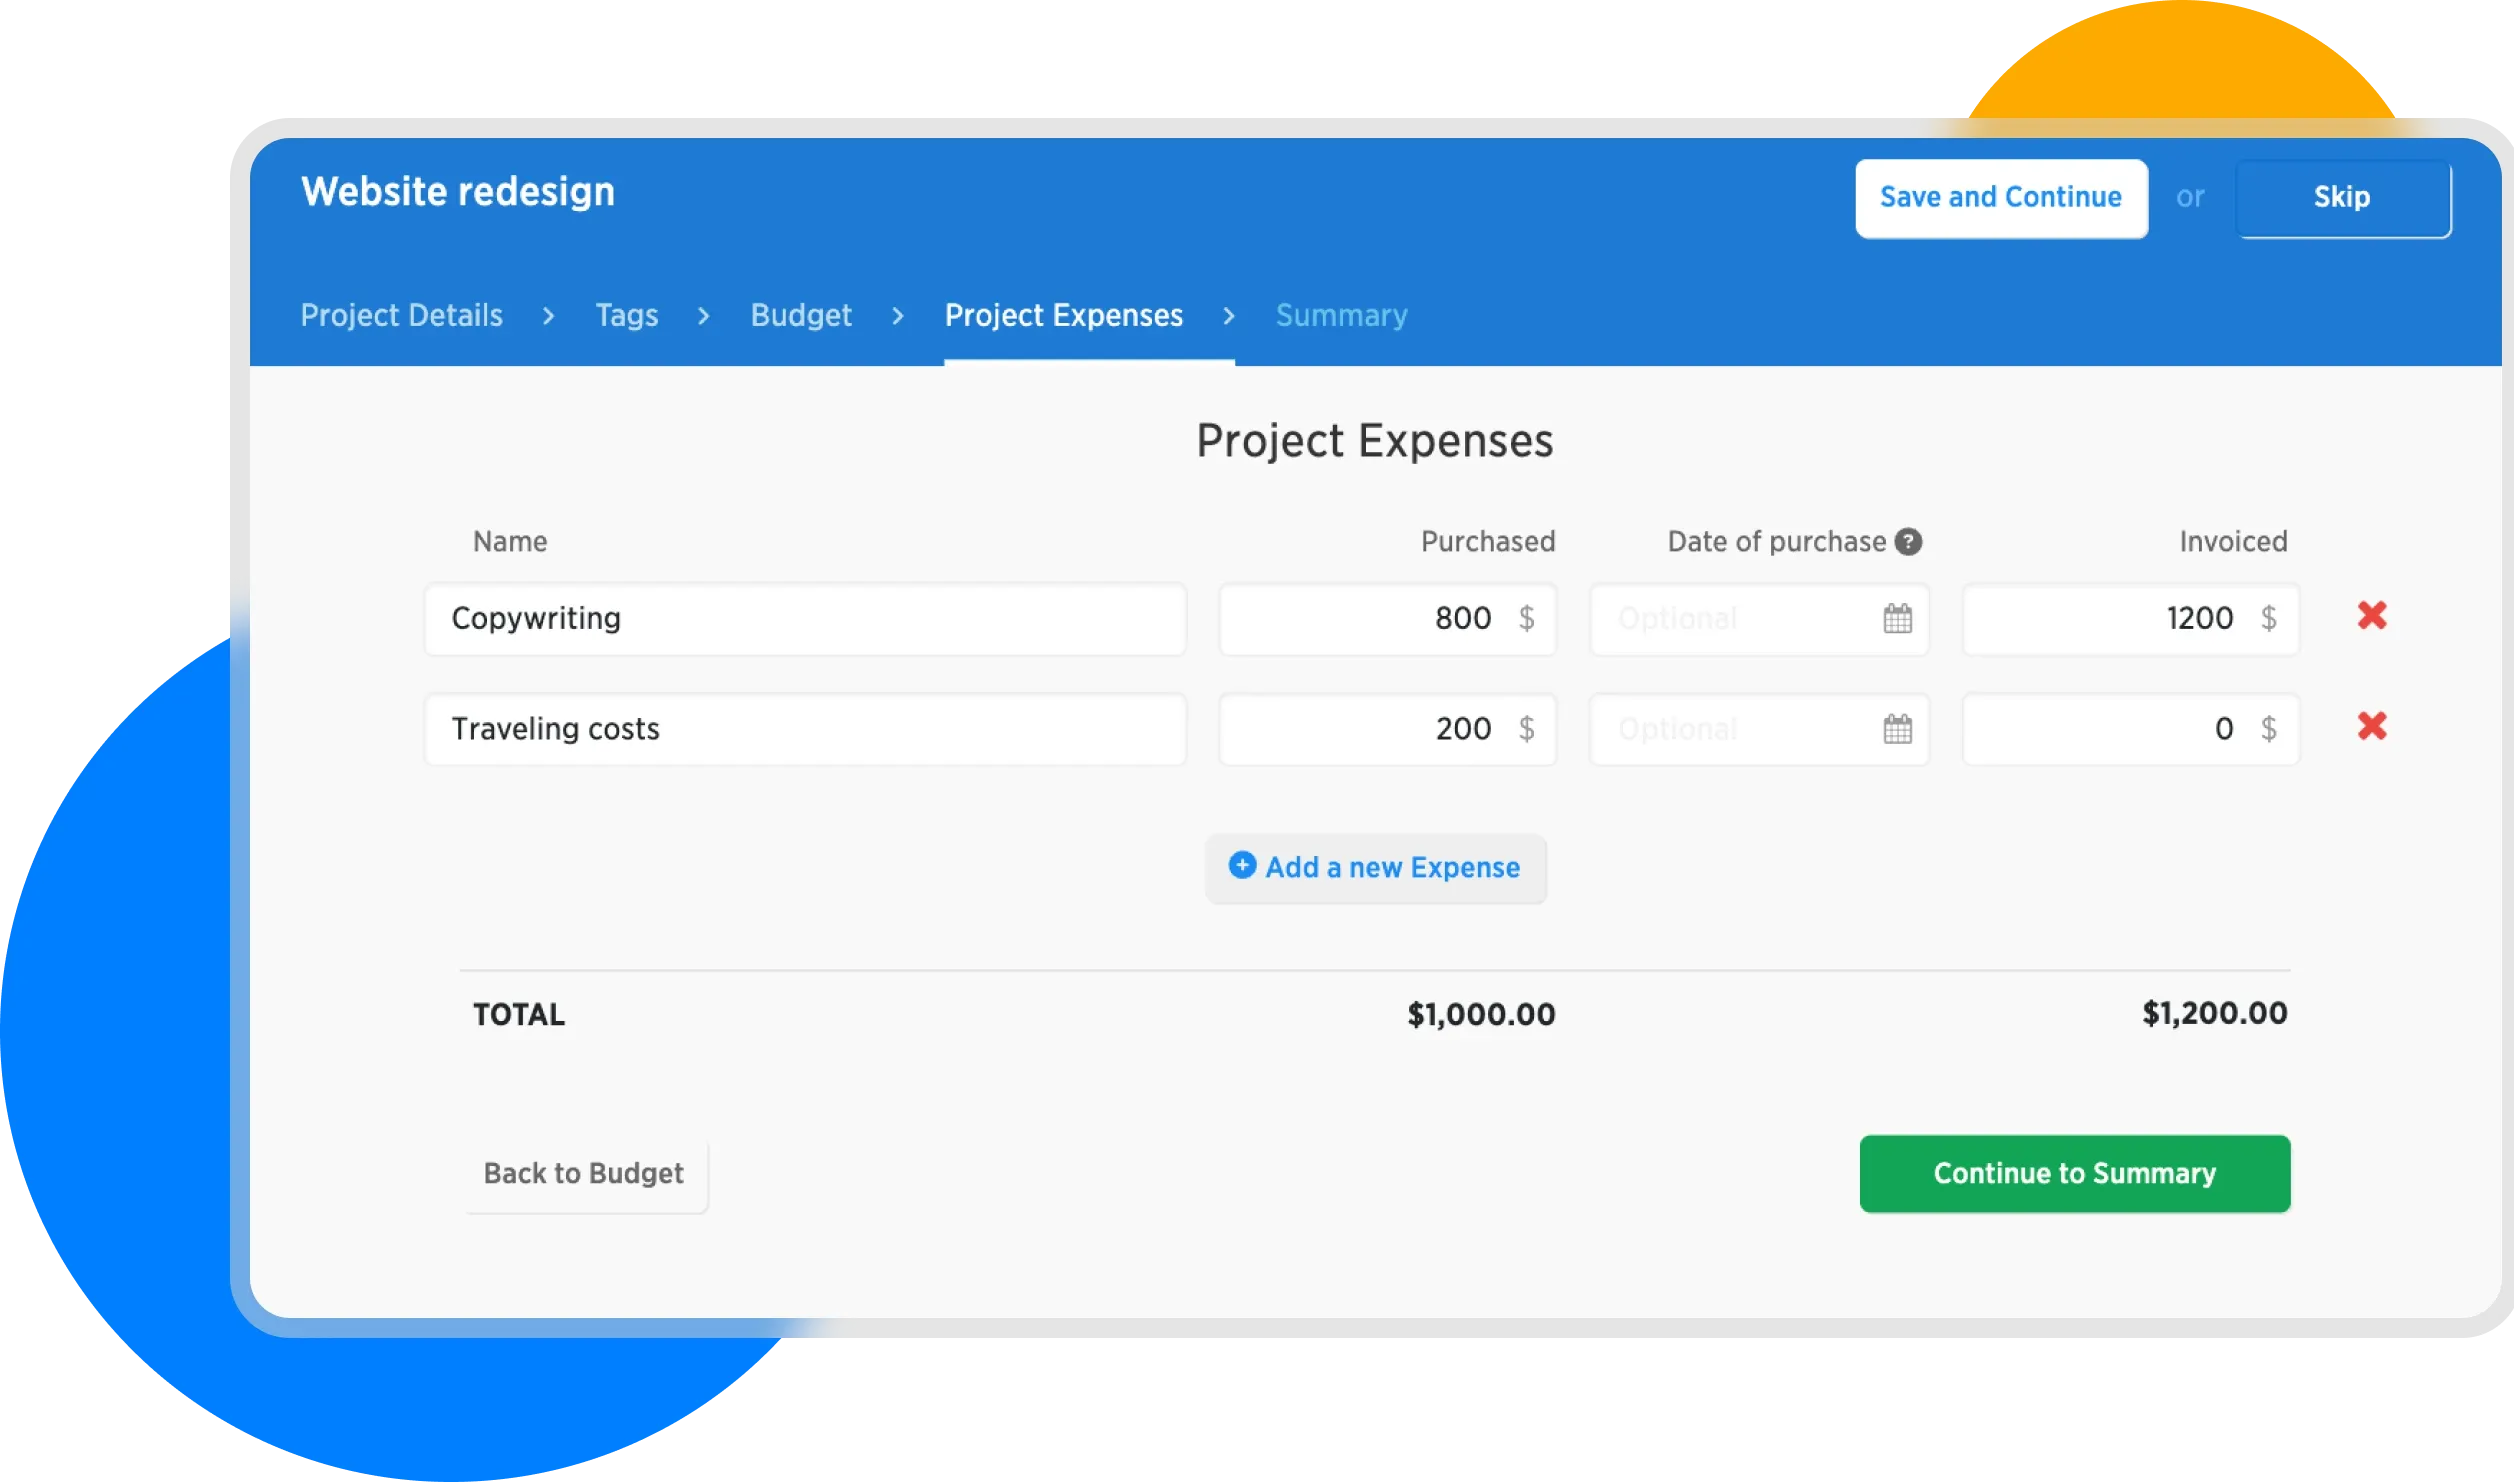
Project Expenses form completed
Here, we see that the total project expenses is $1,000.00 while our revenue will be $1,200.
Click the Continue to Summary button to proceed to the final step.
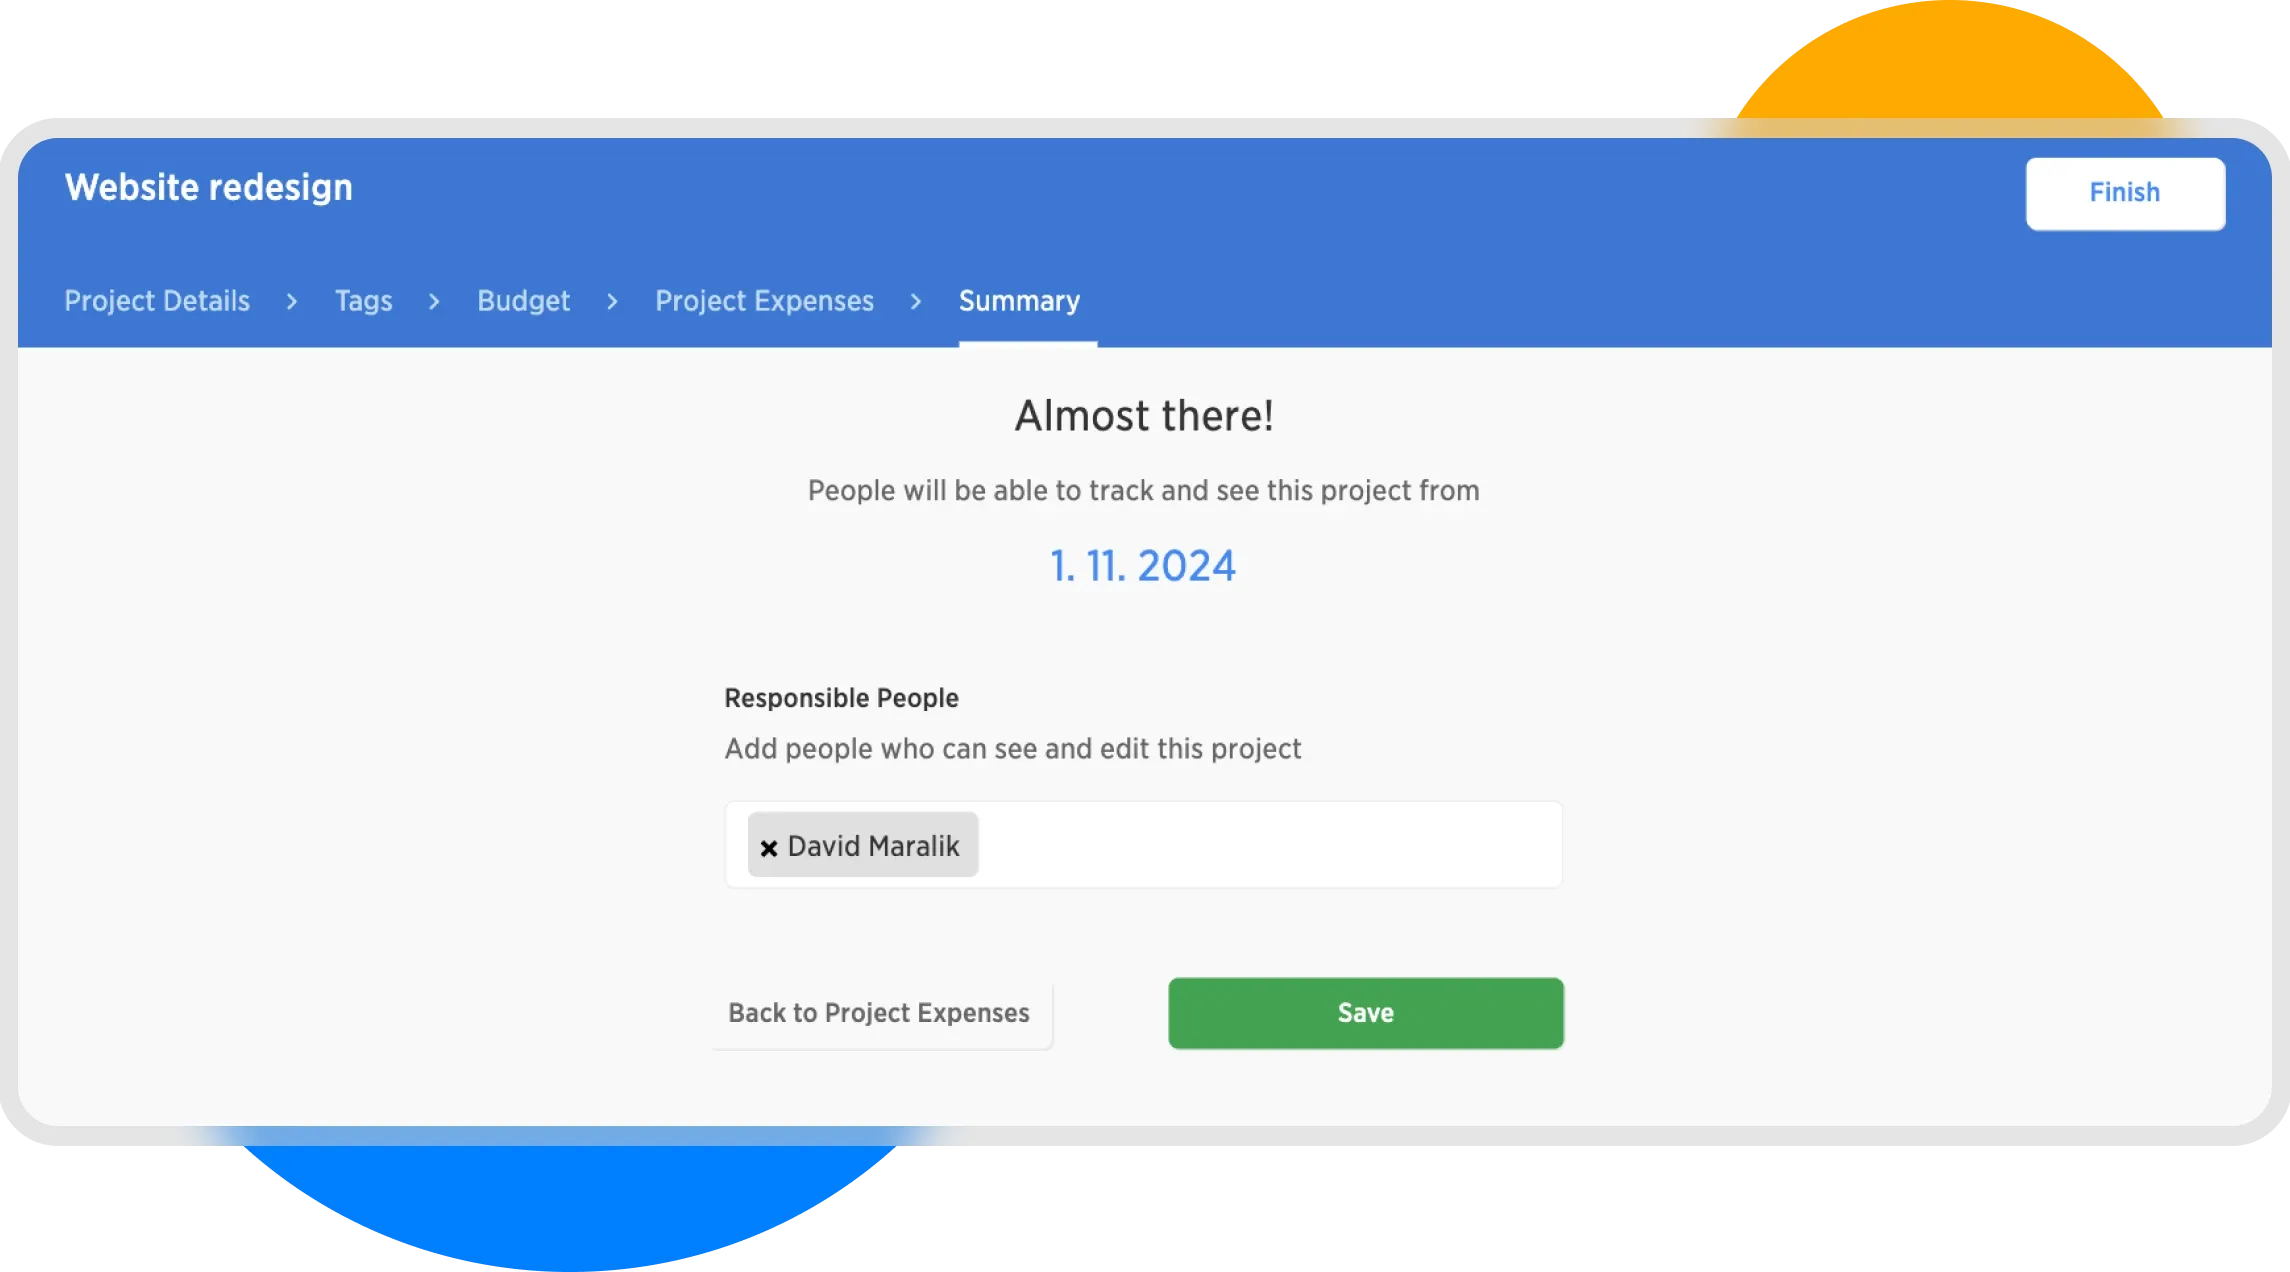
Project Summary and Responsible People selection
In this step, we define the Responsible Persons. You can select from team members with the roles of Administrator and Manager.
Confirm your settings by clicking Save, which will take you to the project detail page.
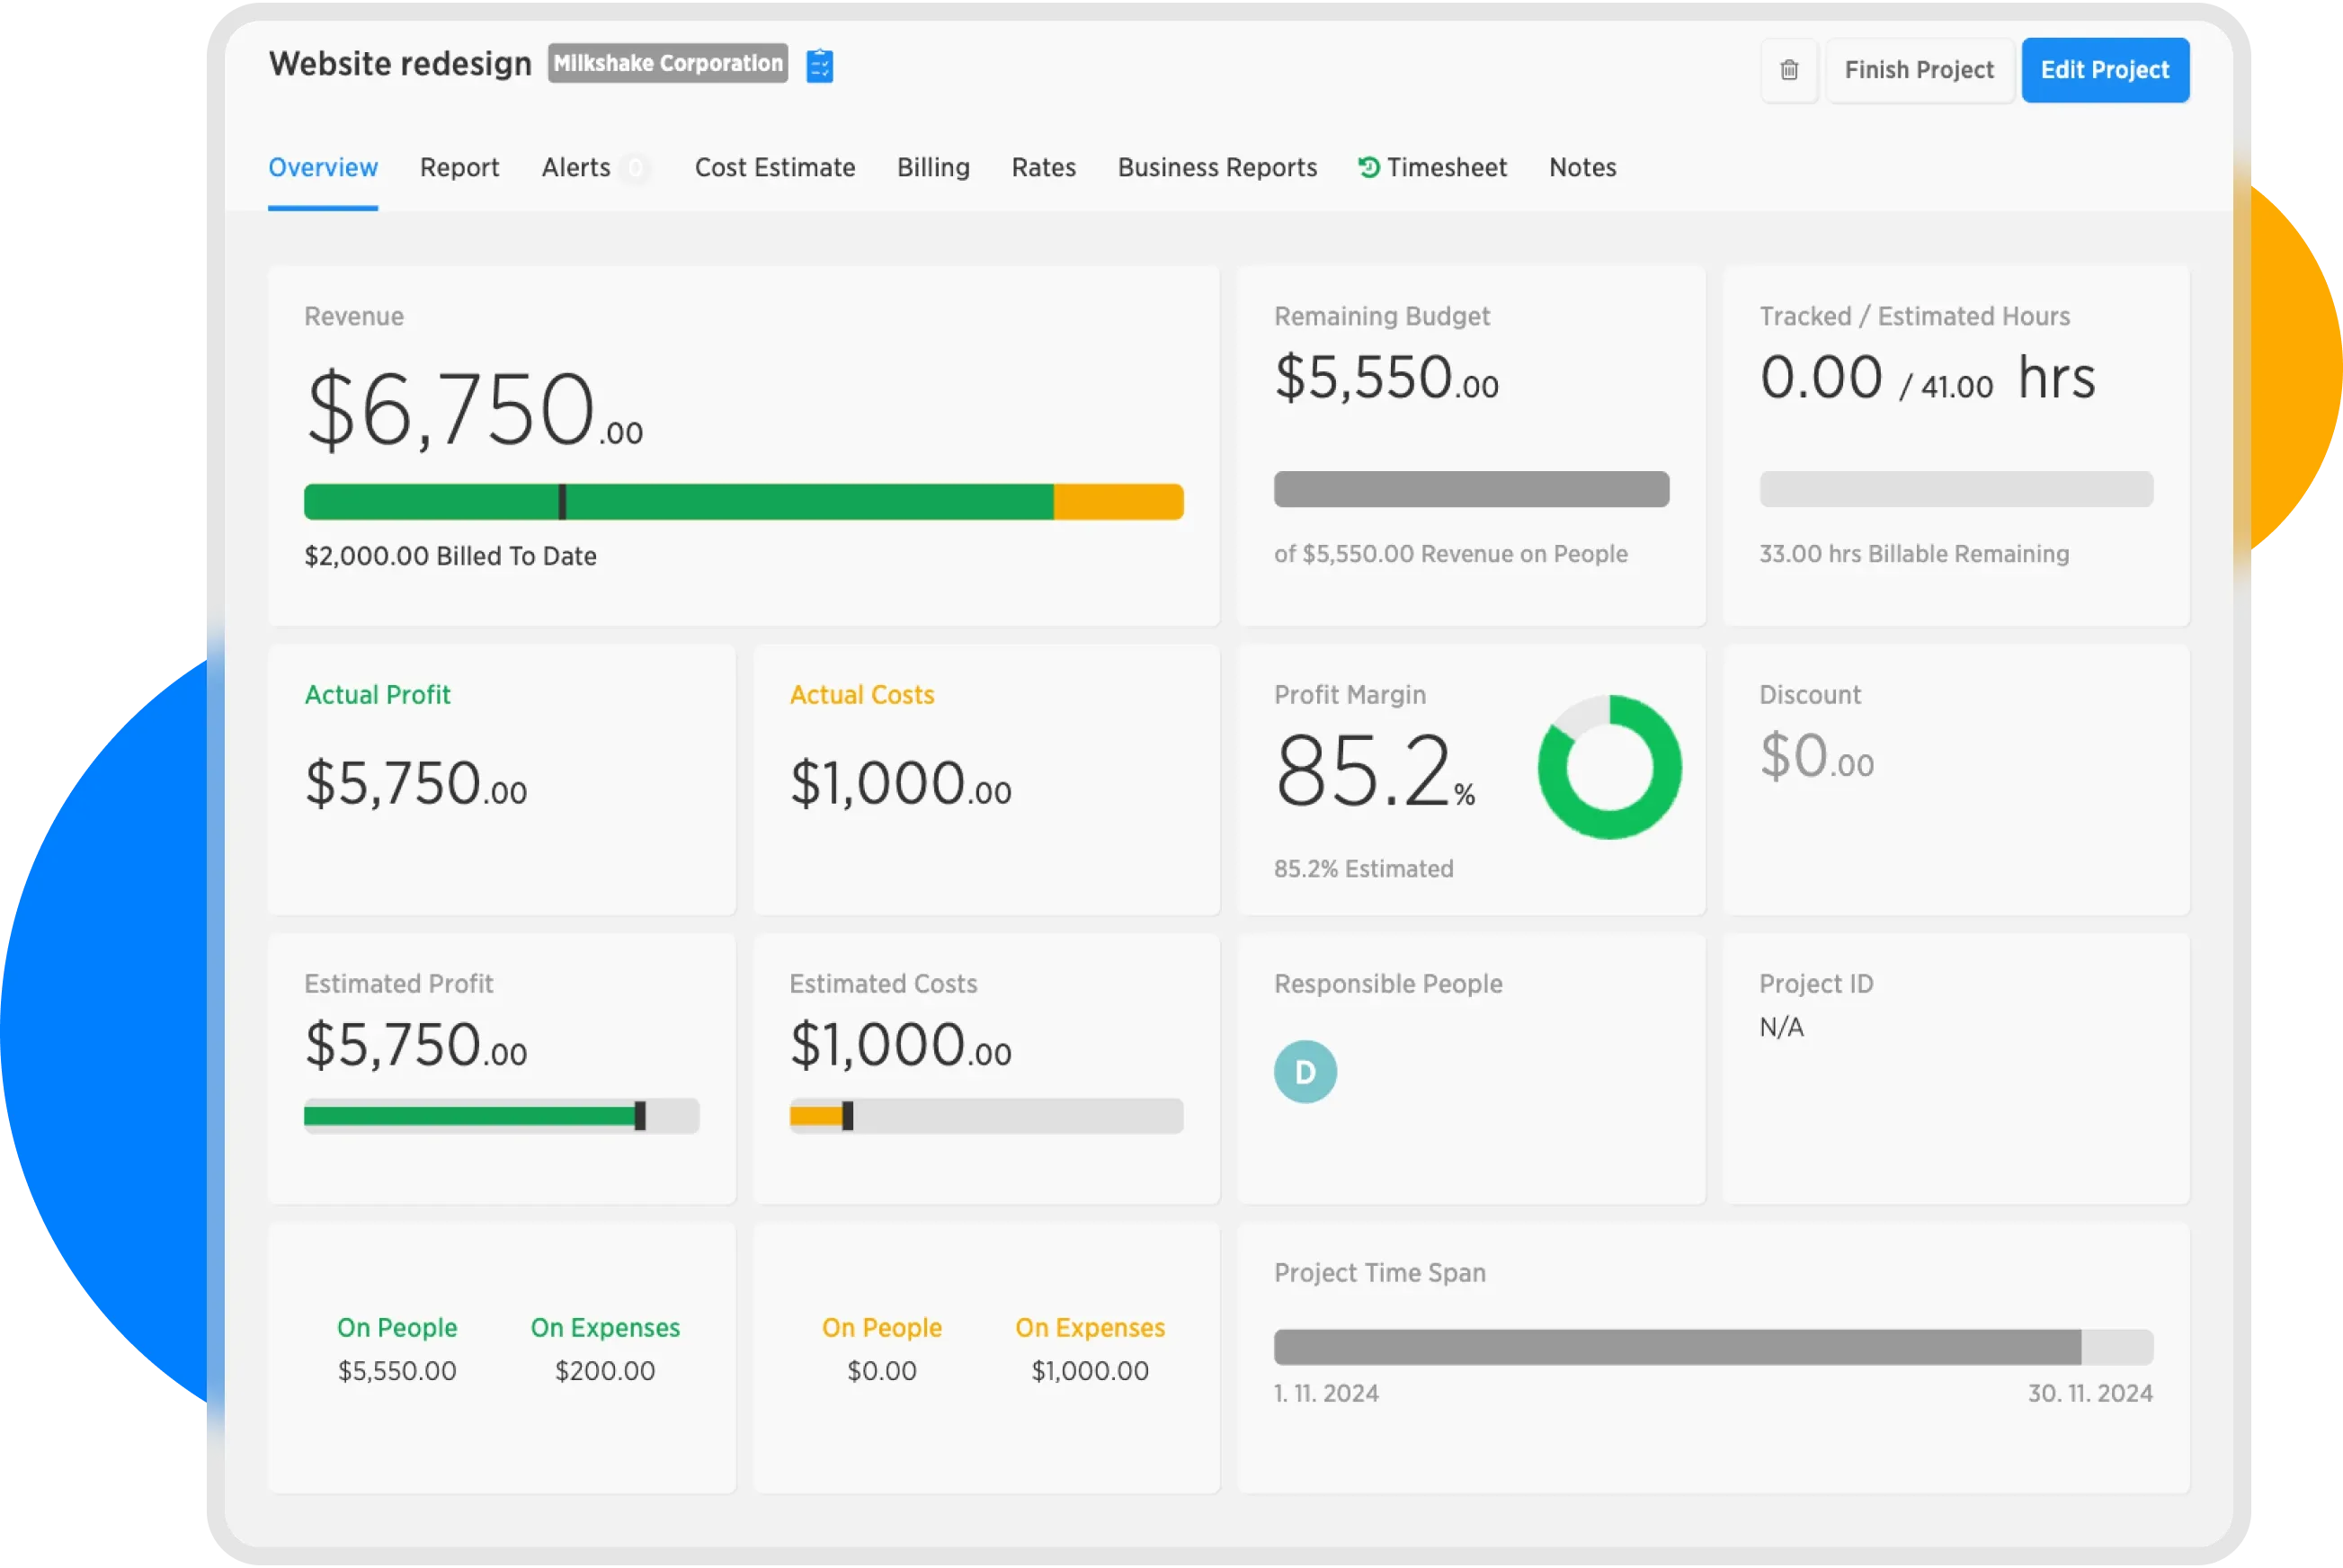
Project detail